I've built a 3D printer, and found a cool effect I wasn't able to find on the Internet yet.
My Setup
I haven't blogged about my 3D printer yet, so let's quickly get that out of the way.
I built a modified RebeliX printer at a workshop. (If you want to build a printer, I'd really recommend you find a workshop nearby, rather than trying to figure out everything by yourself. Tweaking something that already works is so much nicer than debugging an unfamiliar system. And being able to ask experts anything is invaluable.)
I use Fedora's 3D printing stack (conveniently curated by my colleague Miro Hrončok, who got me into this in the first place), so it's all nicely open-source and open-hardware. The three main programs I use are:
- OpenSCAD for modeling (going from idea to a 3D model on the screen)
- Slic3r for G-code generation (going from 3D to instructions for the printer)
- Pronterface for printer control
Today I'll be talking about the second tool in that chain. But first, what will I print?
A Drawer Handle
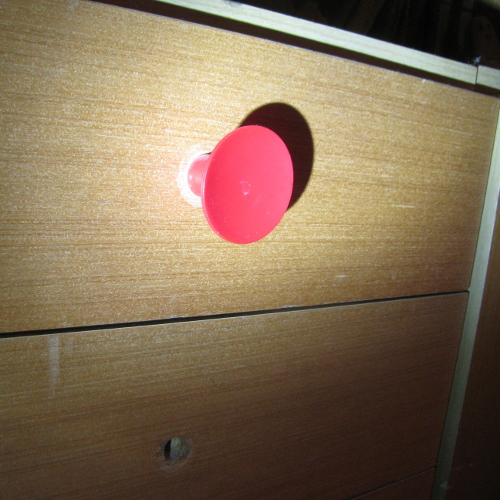
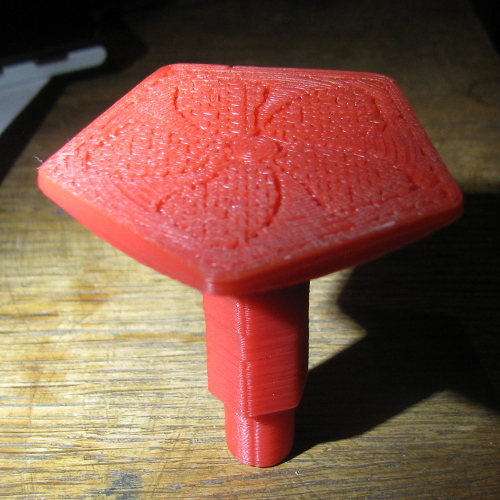
I have some drawers whose handles are pretty flimsy, and as time goes by, they're detaching. Which is a shame, because these big, red handles fit my room really well. And I can't replace them, because nobody makes them anymore. (Well, maybe they do – I didn't look for them everywhere – but the DYI alternative is still more fun!)
So, I decided print handles! I'm designing a handle that can take a screw and a nut, so it should hold well. At this point I'm still learning about prinitng objects with exact measurements, so that part isn't really done. What I have done – perhaps prematurely – is the aesthetical design.
The First Layer
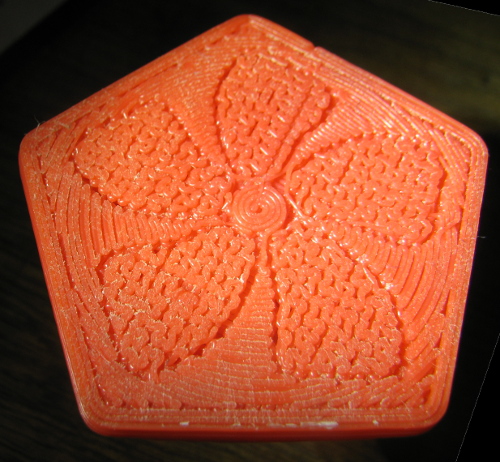
Professionally printed things have a smooth finish, where you can't see the individual strands and layers that make up the object. I'm sure with enouth calibration and finishing work I can achieve that with my printer as well, but for now, everyone can see my objects come from an extruding printer head.
And I like that! Not only me, several people I showed the objects to liked the pattern on the bottom, which is smooth and flat and smooth from lying on the print bed, but still shows the path the extruder took. As any good artist, I get to take advantage of the imperfections in my medium!
The tool that generates the patterns for me, Slic3r, has several to choose from. Some are only available for the inside of objects, because they can't cover 100% of the space, but there's still a good selection: the boring old Rectilinear, the outline-following Cocentric, the fractal Hilbert Curve, the Archimedean Chords spiral, and the angular Octagram Spiral.


They're mostly meant to be functional, but some are quite aesthetically pleasing than others. Being the geek that I am, I prefer the Archimedean Chords and Hilbert Curve. (Octagram Spiral comes in at a close third place, but if I printed that I would be worried about a magic portal to Discworld suddenly opening. (I wonder, would that be a bad thing? Anyway, where was I? Ah, Archimedes and Hilbert.))
The trouble is, I couldn't choose between the two. Is there a way to use both, I wondered?
Modifier objects
Yes, there is! At the workshop I built my printer, the discussion wandered a little too deep into a few obscure details that nobody really uses. One of those is slic3r's modifier meshes: a way to change print settings for a specified part of the object. There's apparently only one documented use case for these on the Internet: strengthening the neck of an ukulele. Let's add another one!
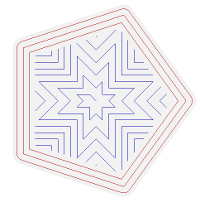
I decided my new handles will be various regular polygons instead of the original circles. I decided to start with a pentagon. To provide some contrast to the geometric infill patterns, I chose to include the Vinca major flower to the design. Its five-fold rotational (but not reflectional) symmetry is quite beautiful.
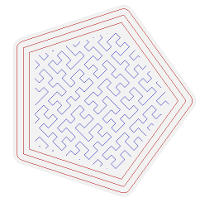
I traced a petal in Inkcsape, and used a plugin to generate a very thin 3D model from it. The thickness is about the same as the first layer of my printout. Then, I added the part as a Modifier object in Slic3r, and set its infill to Hilbert Curve. The rest of the object usess Archimedean Chords.
Et voilà! A combined pattern emerges.
Slic3r adds quite a wide margin between the two areas, which works out well for my use of two large patches of distinct textures. If you want finer control, it might not be that convenient.
Centering
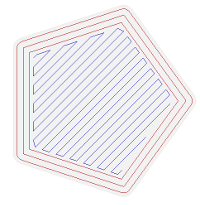
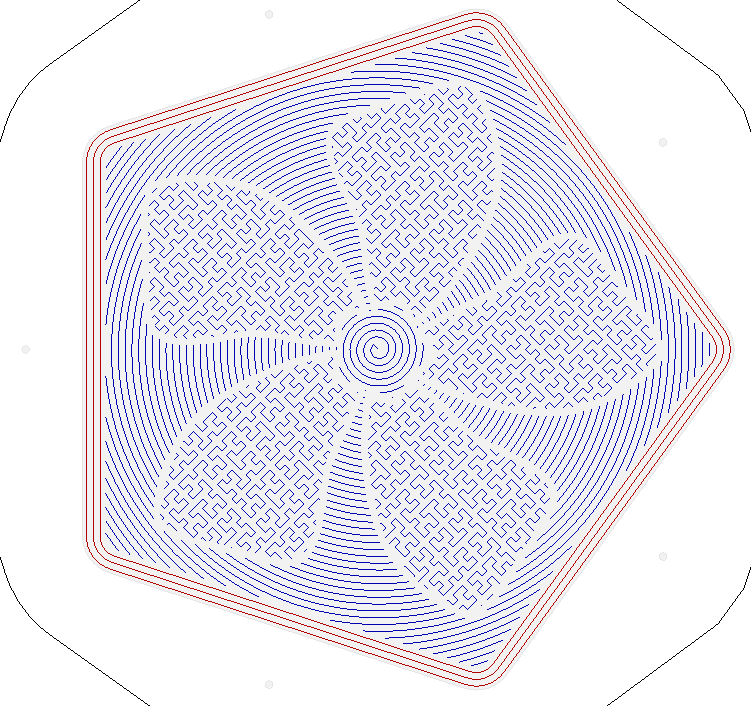
Actually, there's one more thing needed for a nice result. For patterns that have a visible center (i.e. Octagram and the Archimedean Chords), Slic3r seems to use the part's bounding box to compute the center.
For the modifier object, this would be easy to fix: just add a circle around the flower, making it large enough to not intersect the handle itself.
For the actual handle, I instead added little “specks” around the perimeter, small enough to not be printed. You can see them in the screnshot above as light grey dots off to the sides of the pentagon. This tricked Slic3r into putting the center where it should be.
To Be Continued
Now that I have the first layer ready, I'm off to making the screw & nut fit well inside the handle. And, of course, making similar designs for other polygons. And printing other interesting things. Maybe I'll blog about that as well!
By the way, all the files for this project are on Github. Enjoy!
Oh, and if you want me to print anything: come visit me, bring some tea, and we can chat while watching the printer make electronic noises and plastic creations. (Otherwise, i might add a simple, small object to a print job if you send me a fully prepared model, but you're probably better off ordering a print online.)